Character editing
This page is intended for developers and has a more exhaustive list of technical details than Custom Characters
Base
Apart from character creating CharMorph also has editing tools that helps to integrate new characters to CharMorph, as well as edting existing ones.
Structure
Every Characer is located in ./characters/(character-name)
The base directory for characters is located either at the default add-on directory or a user defined one.
The folder structure is usually like;
- hairstyles:
each individual hairstyles is stored as numpy vertices.
- joints:
Joint positions are stored using vertex weights.
- morphs:
All morphs are stored here including L1/L2/L3 morph types.
- weights:
vertex weights are stored, here as a single numpy file based on rig set.
- char.blend:
the base of the character is stored here, without shapekeys or vertex weights, all material slots should be blank and be configured in the config file.
- config.yaml:
the configuration of the characters such as texture sets, metadata, rig types, etc
- eyebrows.blend:
hair is stored using blender’s particle system on a desired mesh and each of them must be enabled in the viewport. then they are added in the hair menu at user discretion.
- rigs.blend:
metarig data is stored, and a rig is generated based on internal/external blender plugins like rigify/auto-rig pro.
- faces.npy:
Stores the default topology vertuces and allows the altnernate topology feature to work on a given character.
Morphs
Morphs are the Lifeblood of all Character Creators, including Charmorph.
They work similarly to Shapekeys but support a destructive workflow Morphs are Created by exporting Shapekeys to external files instead of being stored in the mesh itself.
Morph Level:
- L1:
Reference Body Type: (Shape Basis) Each L1 Morph can have it’s own set of L2/L3 Morphs
- L2:
Minor Morphs: This is where most of the morphs are and are the ones that make characters look more unique.
- L3:
Expression Morphs: This is for Facial Action Coding System (FACS) Shapekeys
L2 Morphs:

Exports Morph as a numpy file with the
.npyfile extension
Note: if you unfamiliar with regex, remove the morph regex expressions when exporting morphlists or multiple morphs.
Metadata:
All L2/L3 Morphs must be listed without their extension in their respective morphs.json files in order to be recognized by the add-on.
Syntax is simple for those accustomed to JSON.
{ "morph": "FILENAME"},
By default Morphs will be able to only go from 0 to 1 but can be overidden by this syntax
{ "morph": "FILENAME", "min": -1.0, "max": 1.0},
The UI sorts the morph into categories based on the first word of the morph without a seperator so in order to keep the UI Clean it’s reccomended to follows this naming scheme.
CategoryName_Morph
For Example:
Chin_Mentalis_Portrusion
or Fantasy_No_Nose
Charmorph also has a UI Seperator to help keep things in the same category organized and less confusing to look at
{ "separator": true},
Hair
Currently Charmorph still uses Blender’s old particle System.
Hair is stored in two locations, in a blend file where either a proxy mesh or intended character mesh will store hair systems and externally in the hairstyles folder for each character.
Use Export Hair or Export All Hair on hair systems this will export NPZ files that Charmorph will import.
Hair must configured in the config.yaml file
an example would be
hair_library: hair.blend
hair_obj: hair-src
hairstyles:
- Eve
- Back1
- Bob
- Combover_zoro_d
- SceneHair_1_O4saken
Rigging
While morphing, your character can sufficiently change proportions so bone locations need to be adjusted too. In CharMorph this is implemented by binding bone locations to vertex groups.
Each bone joint has a special vertex group named
joint_{bone name}_{head|tail}. Joint location is calculated as
weighted average of locations of vertices included in the group,
optionally offseted by some constant location.
These vertex groups can be created manually using Edit mode or
weight painting, or then can be created by CharMorph rigging tools.
To use CharMorph rigging tools you need to select character mesh in “Char” property of Rigging panel and have metarig in edit mode.
“Selected joints to VG” button moves selected joints to their final positions according to their vertex groups.
“Recalc vertex groups” button calculates vertex group for selected joint according to selected calculation algorighm. If “Auto snap” option is enabled it also move the joint to the calculated position
There are different calculation algorighms for different types of joints. Hsually we have 3 types of joints:
interior joints: the most common type of joints. They are located inside character mesh. They include limbs, spine, neck and head.
surface joints: located on the surface of character mesh They are usually used for face expression bones
outer joints: located outside of character mesh They are usually used for helper bones like Rigify heel bone You need to use offsets to make CharMorph correctly place such bones.
Calculation methods for surface joints:
n nearest vertices: This method is usually used to snap joint to nearest vertex. In rare cases it also can be used to bind joint to multiple vertices also for interior joints.
nearest face: snaps joint to surface of nearest face. It also has “snap distance” option that allows optionally to snap joint to nearest edge or vertex if it is within specified distance.
nearest edge: snaps joint to nearest edge
by distance: searches vertices within selected distance and snaps joint to them
Calculation methods for interior bones:
Raycast: Idea of this method consists of casting of rays from joint location to 2 opposite directions When rays hit face surface, we calculate vertex groups for hit faces and then we assign certain weights to these counterpart faces to match joint location as close as possible. Several such ray pairs can be casted at once. “Raycast bone axes” uses bone axes to cast such ray pairs. “Raycast global” can either use global axes or use axes of selected object (usually empty)
Cross lines: This method takes certain amount of nearest vertices and iterates over all possible lines that can be drawn through every pair of vertices. Then it takes n lines that are nearest to the joints and assigns to each pair of vertices weights to match joint location as close as possible.
Bounding box: Tries to find 8 vertices that consist smallest bounding box of the joint and assign them weights according to joint location. Currenly this method doesn’t work very good so it is considered experimental
Other calculation methods:
Current: This method doesn’t change vertices consisting vertex group, it only recalculates weights of these vertices. It works well if there is not more then 4 vertices in current vertex group.
n nearest joints: Takes vertex groups of n already calculated joints and mixes them to match goint location as close as possible
Nearest bone: Takes vertex groups of 2 joints of nearest already calculated bone and mix their vertex groups to snap selected joint to middle of existing bone as close as possible to current joint location.
Neighbors equal: Snaps joint exactly to the center of neighbor joints (parent and child bones)
Neighbors weighted: Snaps joints to the middle of parent and child joints as close to current joint location as possible
When all vertex groups are calculated you can either use these groups directly in char.blend or you can export them to npz file and place them to “data/characters/{your character}/joints/{rig name}.npz”. You need to use “joint_” regular expression for exporting.
Drivers
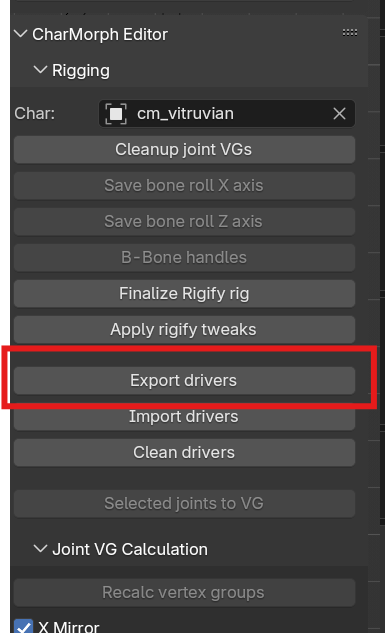
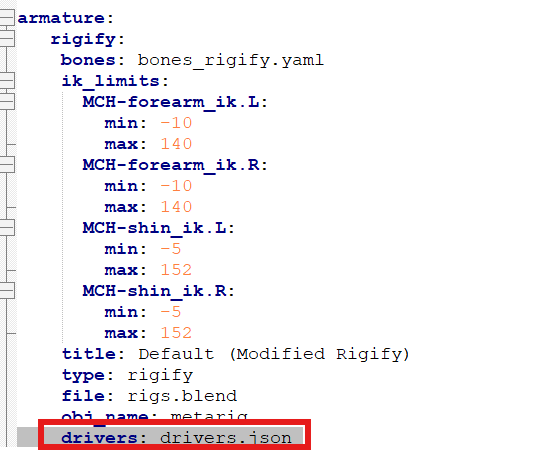
Drivers are a extension of the rigging step, Charmorph allows the import/export of drivers at the finalization step. export the drivers in rigging section of character editing, then specify the location and or name of the json file containing the drivers. Make sure the rig name for the drivers matches the name of the rig that CharMorph generates.
Materials
Materials require fake users as CharMorph defines material assignement in a characters config file based on index. We will be using Vitruvian as an example. The empty slots must be assinged to appropriate geometry.
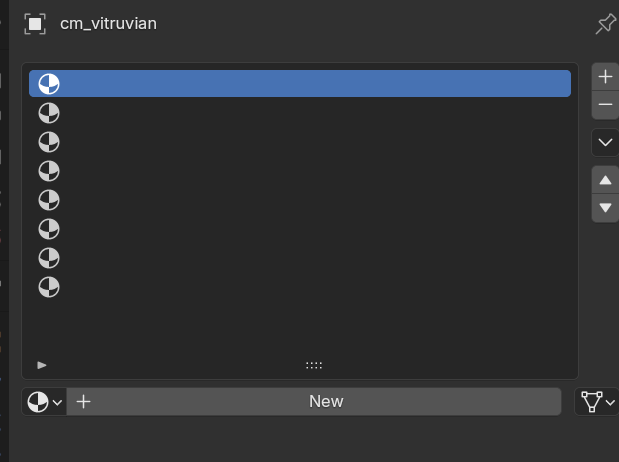
All desired materials must have fake user assigned to it to avoid blender deleting it and for CharMorph to import it.
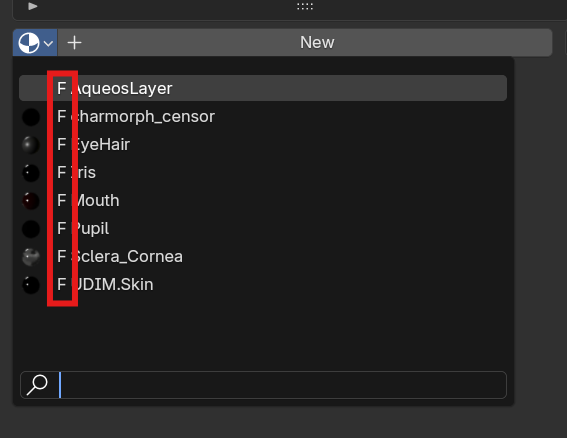
Then the given materials must be configured in the character’s config.yaml file
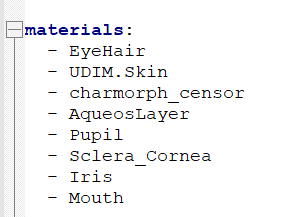
So the first index is for the particle system attached to the character then the skin material, and we go down the list matching them in our config file. The only thing to keep in mind to this order is the charmorph_censor material, when adult mode is enabled in add-on’s settings, it will remove the slot assigned that material, we want to take advantage of how Blender orders the selection of a material slot when a previous one has been deleted to assign the previously censored geometry to the skin material so we place it below the skin material in the slots list and the config.yaml list.
Additionally to expose the settings of a material, one have a nodegroup with the name charmorph_settings with the desired user inputs linked up to the material inputs in question.
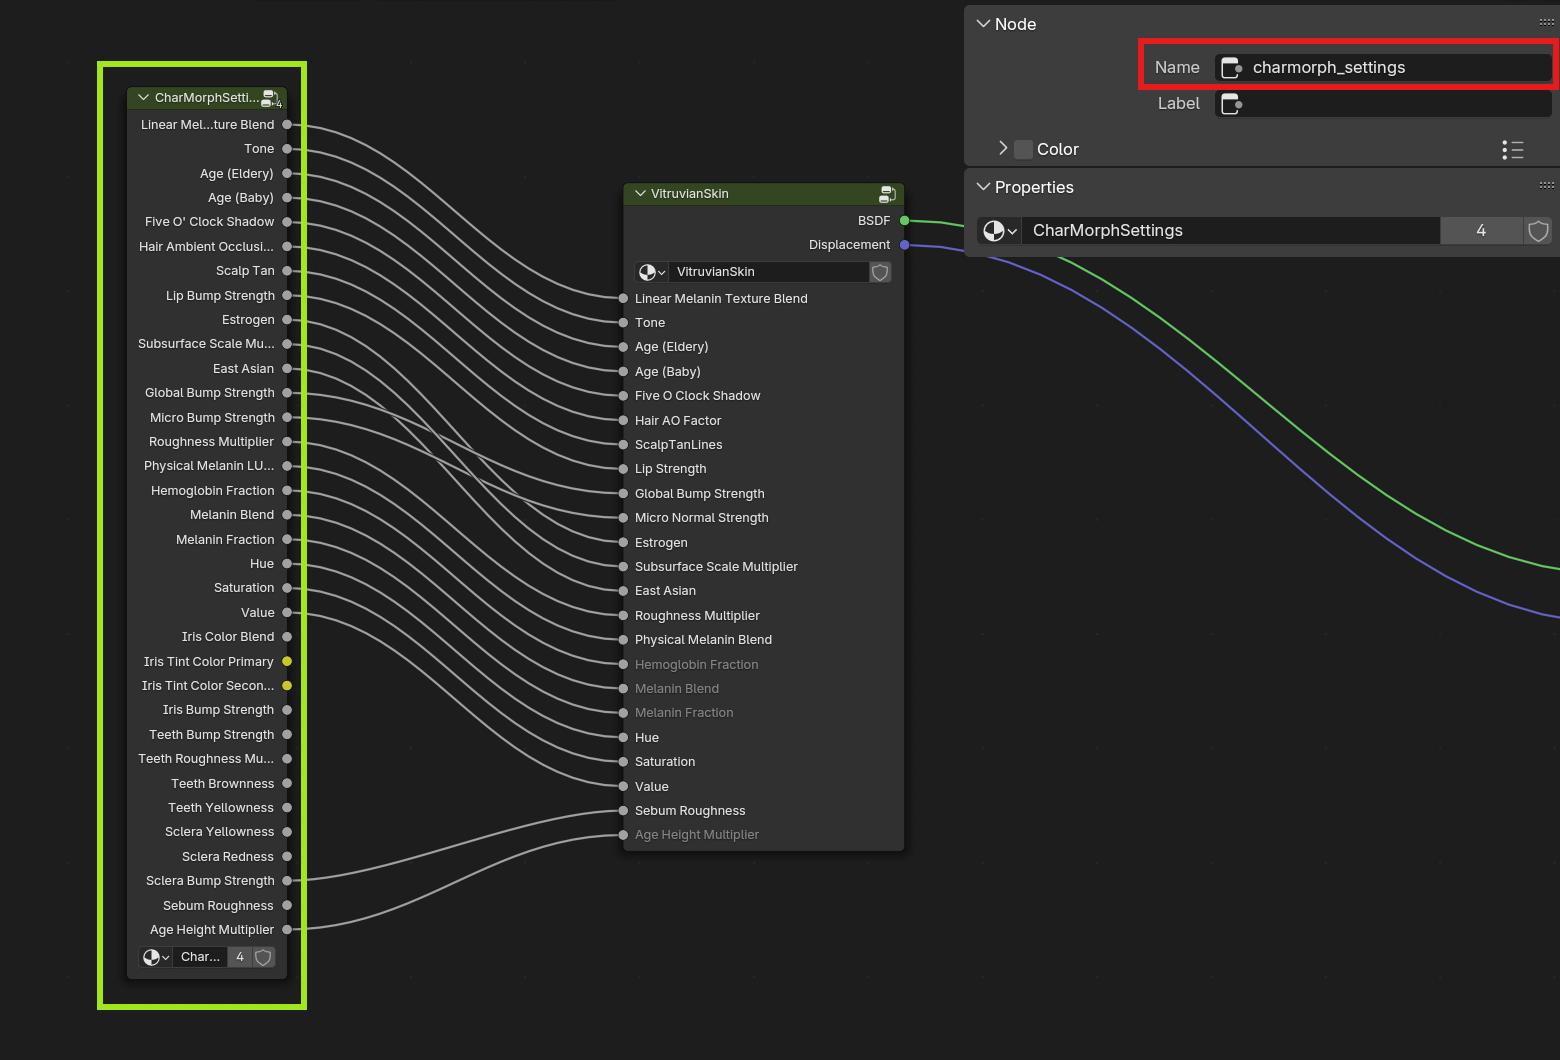
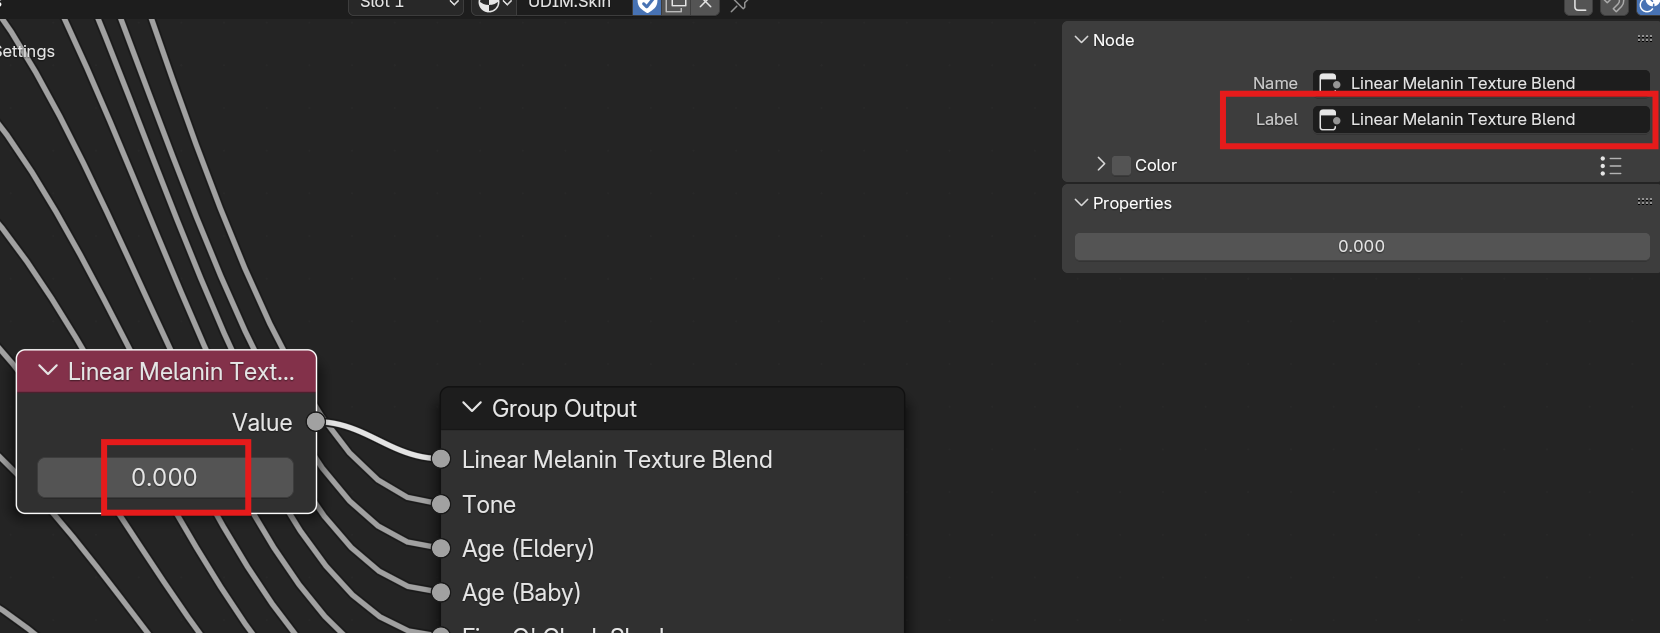
In the nodegroup a value node must be created that matches the desiried name of the user input and it’s default value. So for an example this input will be called Linear Melanin Texture Blend and its default value is 0.
Textures
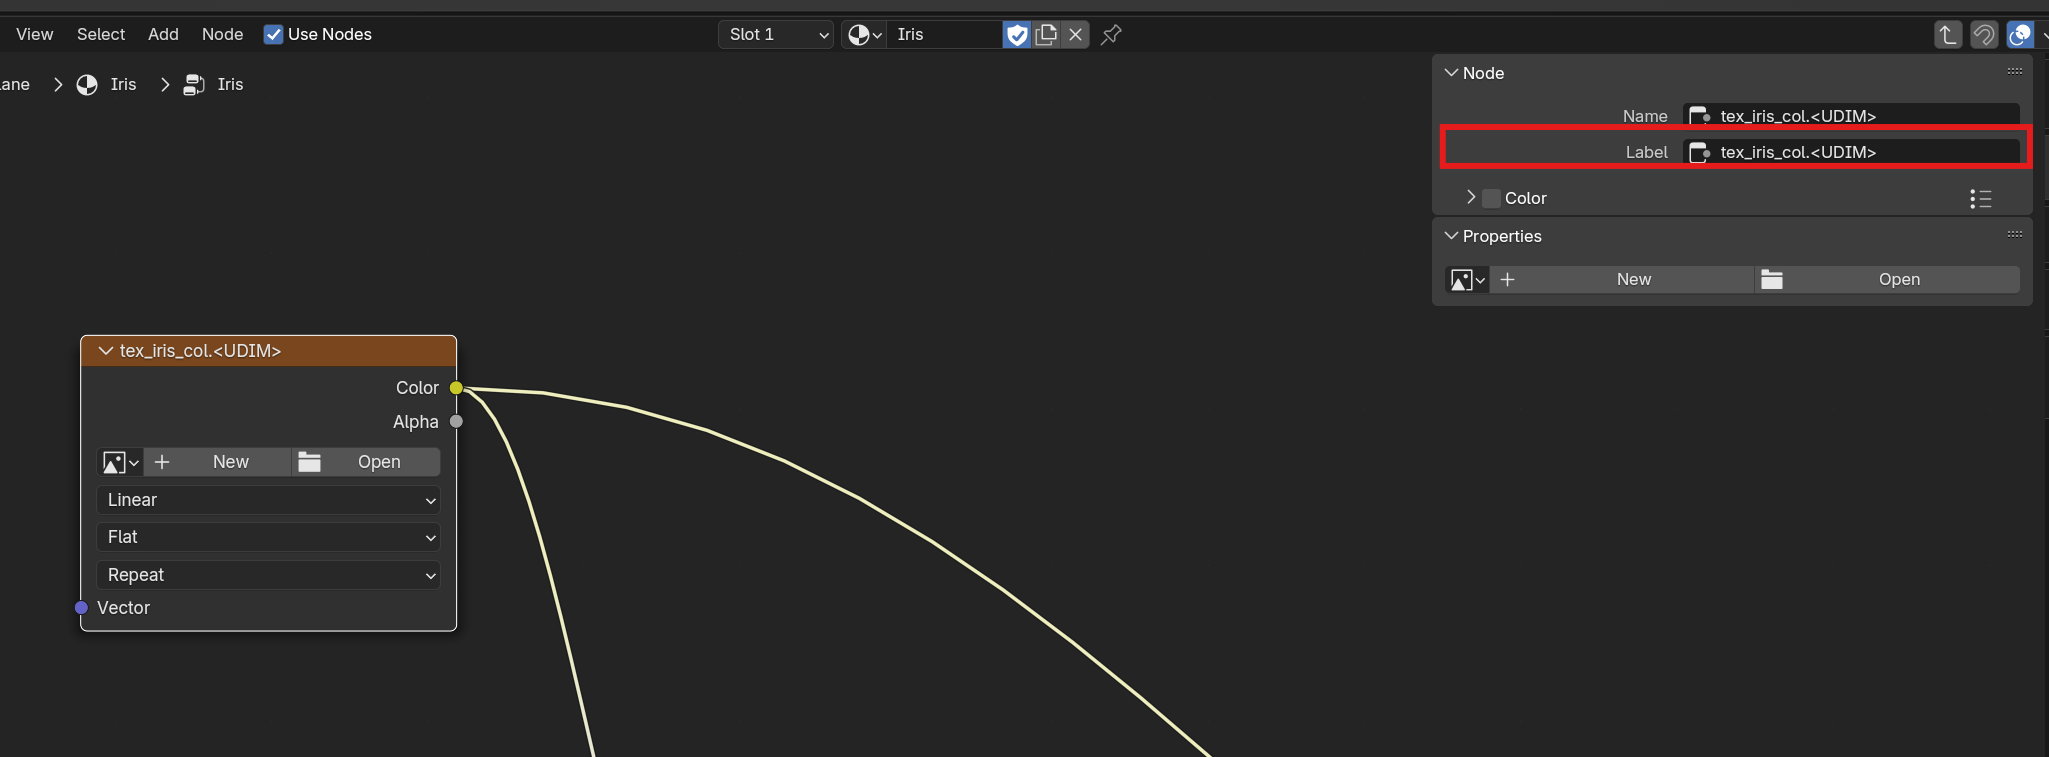
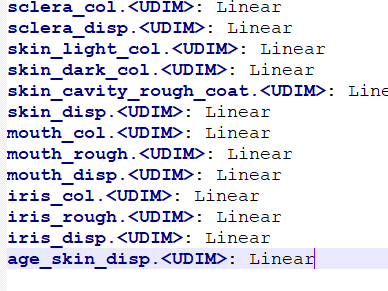
Textures exist on a similar principle as they need to have an empty image file calling the file they need to retrieve from the textures folder
The file it is expecting to receieve is iris_col.1007.exr so we give it the arguments tex_ for texture and at the end .<UDIM> this is so that blender opens it as a tiled UDIM file.
Neccesary for using both UDIMs and assiging colorspaces, the settings.yaml file in the textures folder assigns colorspaces to textures.
This is particularly neccesary for Linear or Non-Color images like Normal or Displacement maps.
Config
Currently Charmorph has these configuration options documented. List is non-exhaustive.
Name |
Options |
Required? |
|---|---|---|
title |
Any |
Yes |
author |
Any |
Yes |
license |
Any |
Yes |
additional_authors |
Any |
No |
char_obj |
Has to match object Name in char.blend file |
Yes |
basis |
Has to match shapekey basis name that L2 morphs were based on |
Yes |